 English
 Español
 Português
 русский
 français
 日本語
日本語 Deutsch
 Tiếng Việt
 Italiano
 Nederlands
 ไทย
ไทย Polski
 한국어
한국어 Svenska
 magyar
 Malay
Malay বাংলা
বাংলা Dansk
Dansk Suomi
Suomi हिन्दी
 Pilipino
 Türk
Türk Gaeilge
 عربى
عربى Indonesia
 norsk
norsk اردو
اردو čeština
 Ελληνικά
 Українська
 Javanese
 فارسی
فارسی தமிழ்
தமிழ் తెలుగు
 नेपाली
 Burmese
 български
 ລາວ
ລາວ Latine
 Қазақ
Қазақ Euskal
 Azərbaycan
 slovenský
 Македонски
 Lietuvos
 Eesti Keel
 Română
 Slovenski
 मराठी
मराठी Српски
 简体中文
简体中文 Esperanto
 Afrikaans
 Català
 עִברִית
 Cymraeg
 Galego
 繁体中文
繁体中文 Latvietis
 icelandic
 יידיש
יידיש Беларус
 Hrvatski
 Kreyòl ayisyen
 Shqiptar
 Malti
Malti lugha ya Kiswahili
 አማርኛ
አማርኛ Bosanski
 Frysk
Frysk ជនជាតិខ្មែរ
 ქართული
 ગુજરાતી
 Hausa
Hausa Кыргыз тили
 ಕನ್ನಡ
ಕನ್ನಡ Corsa
Corsa Kurdî
Kurdî മലയാളം
 Maori
Maori Монгол хэл
 Hmong
Hmong IsiXhosa
 Zulu
Zulu Punjabi
 پښتو
پښتو Chichewa
 Samoa
Samoa Sesotho
 සිංහල
සිංහල Gàidhlig
 Cebuano
 Somali
 Точик
Точик O'zbek
 Hawaiian
 سنڌي
سنڌي Shinra
 հայերեն
 Igbo
Igbo Sundanese
 Lëtzebuergesch
 Malagasy
 Yoruba


Roof heating cables are an important tool in preventing snow and ice accumulation and ice formation during the winter. These cables can be installed on roofs and guttering systems to help prevent snow and ice from accumulating, reducing potential ice damage to buildings. This article will detail how to install roof heating cables to ensure your home remains safe and warm during the cold winter months.
Part One: Preparation of Materials and Tools
Before you start installing roof heating cables, you'll need the following materials and tools:
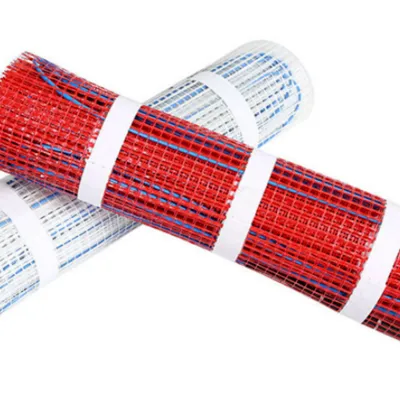
1. Roof Heating Cables
2. Ladder
3. Insulating tape
4.Pliers
5. Cable clamp
6. Cable insulation sleeve
7. Waterproof tape
8. Junction box
9. Cable holder
10.Cable connector
Make sure you use high-quality materials and tools during installation to ensure system reliability and safety.
Part Two: Safety Measures
Before carrying out installation work on your roof, make sure you take the following safety measures:
1. Make sure the ladder is stable and placed on a solid surface.
2. If possible, do not work alone. It's a good idea to have someone nearby in case of emergencies.
3. Use personal protective equipment such as helmets, gloves and non-slip shoes.
4. Avoid installation in slippery or rainy weather.
Part 3: Installation steps
Now, let’s take a closer look at the detailed steps on how to install roof heating cables:
Step 1: Measure the roof area
Before purchasing cable, you will need to measure the area of your roof to determine the required length. Make sure measurements include eaves and drainage.
Step 2: Determine the installation area
Determine the best installation area for the cable. Typically, cables should be installed along the contours of eaves and gutter systems to prevent ice and snow accumulation.
Step 3: Install the cable bracket
Before installing the cables, install the cable brackets to ensure the cables stay in place. Use cable brackets to clamp the cable to keep it in the desired trajectory.
Step 4: Connect the cables
Connect the cables according to the manufacturer's instructions. Typically, cable connectors should be placed inside junction boxes to ensure that the electrical connections to the cables are secure.
Step 5: Secure the cables
Use cable clamps to secure cables securely to the roof. Make sure the cables are evenly distributed and tightly secured.
Step 6: Insulate the cable
Use cable sleeves to insulate cables to protect them from the environment.
Step 7: Install the junction box
Install the junction box in a suitable location to protect the cable connections. Make sure the junction box is waterproof to prevent moisture from entering.
Step 8: Test the system
After completing the installation, perform a system test to ensure everything is functioning properly. Make sure the cables are working as expected and prevent ice and snow from accumulating.
Step 9: Maintenance
Check your cable system regularly to ensure it is functioning properly during the cold season. Remove any snow and ice to ensure system efficiency.
Step 10: Monitor
Monitor weather conditions regularly to ensure proper system operation during severe weather. Perform repairs and maintenance when necessary.
That’s it for you. By installing roof heating cables correctly, you can protect your home from potential damage from snow, ice, and ice. Be sure to follow the manufacturer's guidelines and safety measures to ensure safe and reliable operation of your system. If you are new to cable installation, it is recommended to hire a professional to complete the job to ensure everything goes smoothly. This will help ensure your home stays warm and safe during the harsh winter months.
